

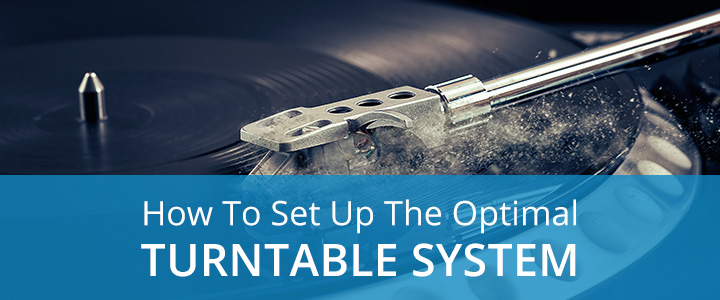
All that low-grade digital music got you down? We at Record Head completely understand the MP3 blues. And we don’t mean Robert Johnson. Nowadays, fed up with low-quality mp3s, an increasing number of people choose to abandon their purely digital music diet and turn to records.
If you’re considering making the switch to vinyl records, you’ve come to the right place. In this guide, we cover the record basics. From turntables all the way to your ears, we’ll dish up the info to get you going with a complete stereo system.
Setting up your first turntable stereo system might seem like a daunting task. Fear not! With this step by step guide, you’ll discover your inner sound technician. Moreover, you’ll learn how each element of a stereo system interacts. This info will help you decide which stereo equipment will best fit your needs.
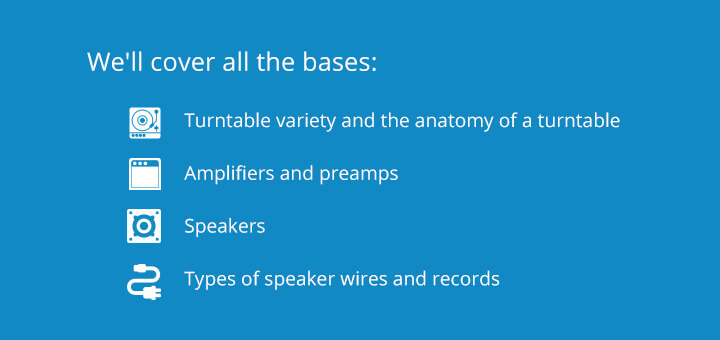
In most of these areas, we’ll concentrate on comparing types of equipment, often with regard to old versus new, and the issues of integrating all the components into the optimal stereo system. But first, let’s talk about why everybody’s choosing to go vinyl.
For the Record
Vinyl record sales in the US jumped up 51.8% from 2013 to 2014. This unprecedented resurgence makes sense if you think about it. Not only do records offer an incomparable warmth of sound, but there’s also simply more auditory information flooding the air.
Records don’t compress the music into a format the same way as digital. To fit the snug little MP3 format, a ton of auditory info gets cropped out. Records feature the original lossless compression. With nothing lost, the sound fills up your room, just as the artist intended.
But better sound quality alone doesn’t explain this phenomenon. People long for tangible music experience. When you stream or download a record, there’s something disenchanting about the experience. No liner notes, no album cover to admire, no tracklisting on the back, no list of musicians, producers, and engineers — nothing.
A new generation of music lovers has discovered the excitement and satisfaction of holding a physical record. There’s something deeply satisfying about ritualistically admiring an album, carefully removing it from the sleeve and delicately placing it on the turntable. All the little stuff adds up.

There’s also a commitment to an album that digital doesn’t offer. We devour digital music like junk food. We channel surf on Spotify, YouTube, or any streaming site like hyperactive children. It’s nice to settle down once in a while and devote time to the physical experience of listening to music. It’s worth it.
We could talk about records all day, but we have equipment to discuss. First things first, prepare for your turntables arrival at your house; it’s a big day.
Find the Perfect Spot
Before you set up anything, find a place to rest your turntable. You’ll want the best surface to support your record player setup. Find a sturdy piece of furniture. It shouldn’t be even the slightest bit wobbly. After all, you’re dealing with a valuable and fragile piece of equipment.
Leave the slapstick to the movies. We’d hate to see your turntable slip off a wonky desk and careen onto the floor. Better yet, if you don’t have a well-elevated surface, just rest the turntable on the floor. But plan on getting a nice desk. Zany turntable antics just don’t make good comedy.
Getting to Know Your Turntable
At first glance, turntable navigation might seem beyond your skill-set. Before you descend into techno-phobia, just relax and learn the basic parts. Honestly, a turntable isn’t rocket science. We know you’re astute enough to learn the core parts. There’s no degree required.
Looking down at your turntable, some parts will seem familiar. You’ve seen enough movies to know where the record goes (on the circular mat, right?). You know the needle reads the spinning record and plays the music, but beyond that, you’re a little hazy.
What do all these glistening switches and dials do? Well, lots of different stuff. We’ll get started with the most obvious parts before delving deeper into turntable territory.
- Dust Cover —The name says it all; this plastic case that covers some turntables protects the delicate instruments from accumulating dust.
- Platter —Your record sits on this large circular part that spins around, turning the record.
- Plinth —The main body of the unit, which houses all the other parts. Essentially the outer casing of the turntable.
- Mat —The disc which separates the platter from your record. Its material helps to cushion the record from the vibrations of the motor underneath the platter. These anti-static mats also absorb external ambient electricity, which helps remove unwanted noise while the record plays.
- Motor —Hidden in the plinth, the motor connects to the platter and allows it to turn. Two main types of motors are common in turntables: direct drive and belt drive. Direct drive motors connect directly to the platter from below, spinning the record on the motor’s axis. Belt drive motors don’t physically turn the platter themselves. Instead, they command a rubber band that spins the platter. Although both motors do a great job, some aficionados prefer belt-drive motors because they claim it transmits less vibration to the record.
- Spindle —That little spike in the center of the platter. What does it do? Well, they’re the reason records have a hole. That’s all we’ll say.
- Stylus —Commonly called the “needle,” the stylus reads the grooves in the record. Although there are a variety of stylus types, the microgroove stylus is the most popular choice for standard records.
- Cartridge —The cartridge houses the stylus. The stylus dangles down from the cartridge to the record’s surface. Although the stylus gets the credit for reading the record, the real magic happens in the cartridge. The way a cartridge works involves a multistage process. As the stylus bumps along the record, these jarring motions move up the cantilever shaft and move a magnet next to a copper coil. The dance of the magnet and coil create an electrical signal. This message eventually reaches the amplifier and speakers and becomes music.
- Headshell —This connects the cartridge to the tonearm. Most turntables come with headshell and cartridge already screwed together, but some require you to do the work yourself. Similarly, some headshells arrive with their lead wires detached to the cartridge. If you purchase an unassembled turntable, simply match the lead wires to their corresponding place. They come in four colors, so just plug the white wire into the white spot, the red into the red, and so on for blue and green.
- Tonearm —This arm-like contraption holds the headshell, cartridge, and stylus. The tonearm is weighted to move along with the record in perfect harmony effortlessly. Not only does the tonearm support the stylus, but it also carries the electrical signal from the cartridge to the turntable body.
- Counterweight —This adjustable weight, located at the opposite end of the tonearm, stabilizes the tonearm. This balancing act determines the pressure exerted on the record by the stylus. The weight of the stylus on the record is called the tracking force. Maintaining an ideal tracking force ensures your stylus stays in place and doesn’t damage your record.
- Anti-Skate —Located beside the tonearm base, the anti-skate affects the horizontal movement of the tonearm. As its name suggests, this little dial prevents the stylus from accidentally skating across the record. Just leave the anti-skate at 0 when setting up your turntable. You can adjust it later.
- Height Adjust —Wrapped around the tonearm base, this part literally adjusts the tonearm’s height. Level tonearm height ensures that the stylus makes balanced and direct contact with the record.
- Cueing Lever —That little lever on the tonearm base lifts and lowers the stylus on and off the record. Maybe you’re thinking, “Why can’t I just lift and lower the stylus with my hand?” Well, you can, but you shouldn’t. When moving the stylus with your hands, it’s easy to let the stylus slide across the record. Even a slight miscalculation can damage the delicate vinyl. After all, to err is human. Let the machine do the work.
- Tonearm Rest —The slot for the tonearm when it’s resting.
- Speed Switch —Lets you adjust the speed to certain record requirements.
Newer vs. Older Turntables
Found Turntables
One day, you’re cleaning out your attic and discover an old turntable. Sure, it’s a little dusty, but it probably plays ok, right? Naturally, when an old turntable falls into your lap, you get what you pay for. You might get an old Rocky Balboa champion of a player, but most shouldn’t get back in the ring.
Even if your antique player looks alright, it likely harbors some inner demons. Motor problems, worn belts, a useless stylus, and wonky weights all plague old players. But hey! Maybe just replacing a part or two might fix it up. That’s a big “maybe.” Moreover, damaged players love to inflict pain on helpless records. Remember, everything needs perfect harmony to work smoothly. Otherwise, you’ll end up tearing apart some of your favorite albums.
Older, Well-Built Units
Leave that dusty garage sale turntable where you found it, but don’t rule out all old units. Well preserved and cared-for turntables offer many benefits. Some of these advantages include:
- Lower Price Tag — Sometimes, it all comes down to cash. Used models equal major savings. If you don’t mind a turntable that’s lost its luster, you can save a bundle. Of course, you might prefer a more vintage model anyways. Of course, we’ll help you decide if a record player is worth saving. Although an older table may not be functional, it’s often worth fixing and refurbishing. After all, you don’t want to spend 100 dollars fixing a 60 dollar turntable. We offer a due diligence service to determine the pros and cons of repair versus replacement. In addition to costing less, older turntables look great. Like an ancient talisman, an old player exudes an aura of nostalgia, mystery, and power. A decently priced, vintage player may suit your style perfectly.
- Superior Durability — In many ways, old turntables lend credence to the saying, “They don’t make ’em like they used to.” Older turntables often feature superior craftsmanship to newer units. They won’t break down as easily and will last you a long time.
- Arguably Better Sound Quality — Many record enthusiasts swear by older turntables. Of course, the way music sounds depends on you, but well-built machines yield higher quality results. We know you want the best level available. After all, that’s why you’re bothering with records.
Ultimately, in the battle between old and new, it all comes down to machine functionality. If a turntable works well, sounds good, and won’t drain your finances, then it’s a good player. Knowing this, you might also consider a new turntable.
Brand Spankin’ New Units
Nowadays, the record boom has kicked out some superb new turntables. With manufacturers scrambling to cash in the recent resurgence, and labor costs relatively low, there’s a bundle of inexpensive and well-made models to choose from.
In addition to price and quality, there’re other bonuses to consider when looking at new turntables.
- Added Convenience –The main perk of a new turntable is…it’s new! Sometimes that old turntable just isn’t worth saving. Occasionally, the likelihood of future breakdowns exceeds sentimentality. That old player might need to retire. When purchasing a new record player, the deliberation becomes much simpler and convenient. You get to start fresh and not need to worry about repairing anything. For a novice turntable enthusiast, a new turntable offers a headache-free alternative to older units.
- Outdated Players- A lot of the inexpensive newer turntables are not of acceptable quality. They lack the necessary build quality for proper record playback. Sometimes the decision to buy a new player is made easier by accepting the practical limitations of outdated players.
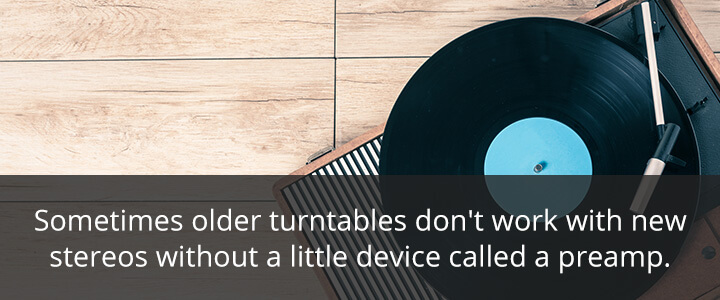
Speaking of the path of least resistance, consider the dilemma of compatibility. Sometimes older turntables don’t work with new stereos without a little device called a preamp. Whether you decided to buy new or used, just ensure you pick a record player that will support your turntable set up.
What’s A Preamp?
Before we delve down the rabbit hole of sound system science, here’s the lazy man’s version:
- You need a preamp.
- New units have them; most old ones don’t.
- If you want an old unit, you’ll need to buy a preamp separately.
- This type of self-contained preamp is called an in-line phono preamp.
- No worries, we sell them.
While we’re on the subject, the best preamp we sell is made by Bozak, and it goes for $34.99. If you find a beautiful old turntable, you won’t break the bank by accommodating the shortcoming of its age.
Although it’s no big deal buying a preamp, it’s still easier to not. This represents a nice perk of a newer turntable. But what exactly does a preamp do?
What A Preamp Does
A typical preamp takes the signal produced by a turntable, called the phono output signal, and converts it into a line-level signal. This new signal, sometimes also called the AUX signal, is compatible with your amp and speakers. They don’t speak “phono,” so the preamp needs to translate.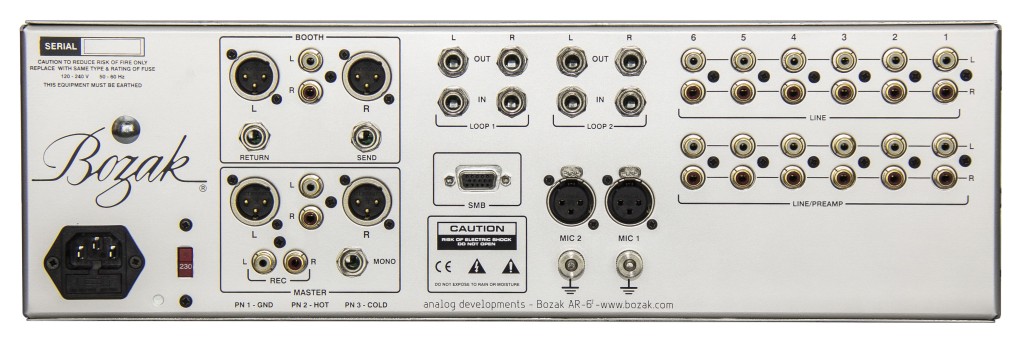
Stereo To The Rescue
If your stereo or amplifier has a phono section, it will convert phono to the line level. The problem arises when modern stereo equipment doesn’t possess this feature; then, you’ll need an in-line phono preamp to deal with the old turntable’s unconverted phono signal.
The issue primarily involves amplifying the sound of the stylus. In addition to converting the signal, your stereo’s phono section, or in-line preamp, pumps power back through the RCA cables, into your turntable, up the tonearm, and into the cartridge to amplify the stylus.
Without phono, you’re stuck with the original whisper level signal produced by the turntable. The amplifier’s phono section helps boost this signal similar to the pre-amps that we mentioned, except the phono functions inside the unit.
It’s an interesting feature of records that the stylus plays the record. Every other aspect serves to amplify its movements. The stylus sings its tiny song, and the rest of the machinery lifts it, elevating its music to audible levels. Don’t believe us? Try playing a record without any amplification, and you’ll hear the stylus quietly playing the record independently. You can’t say that for your MP3s.
Amplifiers
Now you’re an expert on turntable basics; you’re ready for the next step in setting up your optimal turntable stereo system — amplifiers. If you feel exhausted after mastering the anatomy of a turntable, don’t worry, amps are easy.
Unlike all the turntable elements to consider, amps exist as simpler beasts. Essentially, they behave as self-contained units that channel the auditory signal onward to the speakers. They do their humble job with masterful grace and resilience.
A well-built amp will last you decades. Like a lumbering tortoise, they pump out their rhythm for a long time. Unlike the world of turntables, where the battle between old and new rages on, the consensus with amps states, “the older, the better.”

So, out with the new and in with the old! Of course, we’re generally speaking, but most older amps kick out the jams much better than the younger whippersnapper ones.
When it comes to pure auditory bliss, nothing beats a quality vintage amp. But your individual needs might call for other considerations.
Music vs. Home Theatre Reinforcement
Since you’re setting up a turntable stereo system, you likely want the best music. But what if you want your home theater to run through the same amp? We just claimed that vintage amps offer superior sound, but they’re sometimes incompatible with all your modern gizmos.
Nowadays, amps come with all the bells n’ whistles. We’re talking Bluetooth, Apple product compatibility, HDMI input, AirPlay; you name it. If you want to run all your 21st-century gear through a single amp, then grab a newer one.
However, some older amps can handle a variety of modern demands. Many elder amps feature multiple inputs to accommodate your turntable and TV set. It all depends on your specific requirements. Keep a clear head when trying to match old with new.
When buying an amp for your home theater system, make sure it can handle phono. Otherwise, you’ll need an in-line phono preamp for your turntable (like we talked about before).

If you feel worn out by all this compatibility talk, relax. We’re finally onto the last (and easiest) step in setting up your turntable…the speakers!
Speakers
Speakers are easy going. Once your turntable and amp get sorted, your speakers will take it from there. Just hook up the speaker wires to the back of your amp and turn it on. Speakers work well with any amp which offers the correct inputs.
With speaker wires and amps, it’s fairly universal. Just match red wire with red input, and black with black. Many amps feature multiple inputs for the left and right speakers surround sound. It all depends on how many speakers you have. Play around and discover what works best. When it is time to trying out your speakers, select a few songs that really test their sound.
Active vs. Passive Speakers
The main distinction in speaker types concerns active and passive speakers. The two choices breakdown like this:
- Passive: Require a separate amp but no external power source
- Active (aka Powered): Contain their own amp, which requires external power.
Most home stereo systems rely on passive speakers. Their signal runs through an amp dedicated to cultivating the sound perfectly. Although your sound quality will depend on both your particular amp and passive speakers, the double combination often yields an impressive result.
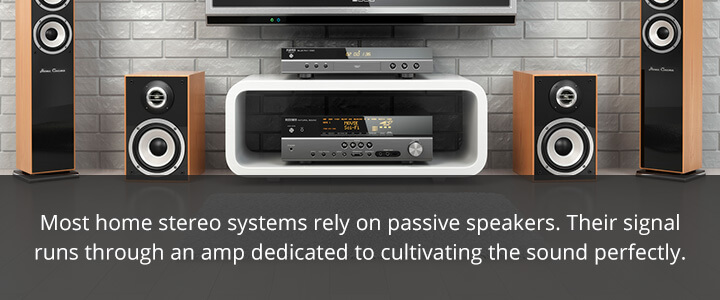
Active speakers often house an amplifier within their casing. This requires you to plug them in. Some active speakers don’t have amps and require an in-line preamp. In either case, you won’t need an external amplifier.
So which sounds better? Honestly, there’re arguments for both speakers. It pretty much depends on the quality and makes of the speakers in question and their relationship to your whole stereo system.
We, at Record Head, stand by both varieties. Whatever your needs require, we’ll help advise you on the best option. Right now, we have some awesome Alto Powered Speakers, which are definitely worth checking out on our website.
Now that you know the ins and outs of a turntable, amp, and speaker, let’s touch on a few finer points of stereo setup: speaker wire and records themselves.
Speaker Wire
Speaker wire comes in several gauges. Gauge relates to the thickness of the wire. With gauge thickness numbers, the rule goes “the smaller the number, the thicker the wire.” A wire with a number 24 gauge is thinner than a 20 gauge wire, and so on down to 0 gauge, which is the largest.
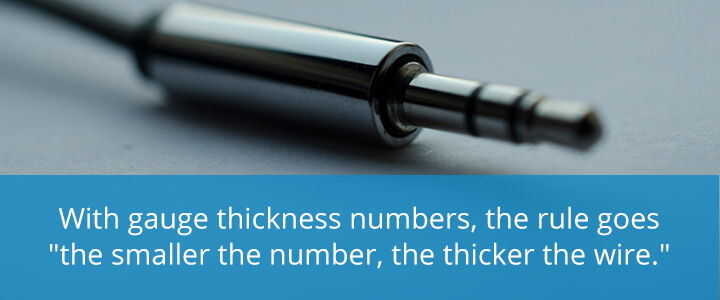
The gauge depends on how far away your speakers are from the amp. For longer distances, thicker wire ensures a reduced risk of power failure. Most close range speakers only need 12-gauge wire. This gauge sounds great and really does the job.
When you get up into the 200 feet plus range, you’ll need a 14 or 16 gauge wire. Unless you’re running a stereo from your
Records
Records come in three different speeds, measured in RPM (revolutions per minute). The standard 12″ LP (long play) plays at 33 1/3 RPM. Most full-length albums are LPs. The next level down is a smaller album called an EP (extended play). Eps are 7″ and consist of fewer songs that an LP.
Lastly, some rare big band and polka records require an even faster setting at 78 RPM. If you’re not sure about the speed, just adjust the pitch to make them sound correct.
Become A Record Head!
Now you’re an expert at basic turntable stereo equipment; you’re ready to set up your own system. Come down to our Record Head Milwaukee location or check out our website. We’ve got all the gear you need to get going and tons of albums to make your system sing. You can also shop our records online.
-
Related Posts
 The Future of Vinyl Records
 Taking Care of and Storing Records
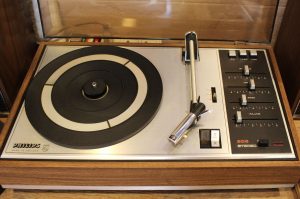 Guide to Getting the Best Sound From Your Turntable
 10 Best Video Game Soundtracks of All Time
 The 6 Bestselling Greatest Hits Album of All Time
 7 of the Best Ever Rock Guitar Solos
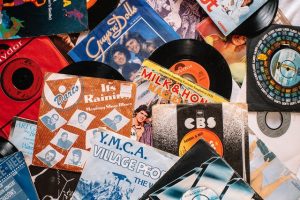 What Makes Some Records Valuable
 What You Need to Know Before Selling or Trading in Your Records